Quantcast
Channel: all and sundry
Viewing all 250 articles
Browse latest View live

Docker RabbitMQ cluster

$
0
0
I have been trying to create a Docker based RabbitMQ cluster on and off for sometime and got it working today - fairly basic and flaky but could be a good starting point for others to improve on.

This is how the sample cluster looks on my machine, this is a typical cluster described in the RabbitMQ clustering guide available here - https://www.rabbitmq.com/clustering.html. As recommended at the site, there are 2 disk based nodes and 1 RAM based node here.


To quickly replicate this, you only need to have fig in your machine, just create a fig.yml file with the following entry:

rabbit1:
image: bijukunjummen/rabbitmq-server
hostname: rabbit1
ports:
- "5672:5672"
- "15672:15672"

rabbit2:
image: bijukunjummen/rabbitmq-server
hostname: rabbit2
links:
- rabbit1
environment:
- CLUSTERED=true
- CLUSTER_WITH=rabbit1
- RAM_NODE=true

rabbit3:
image: bijukunjummen/rabbitmq-server
hostname: rabbit3
links:
- rabbit1
- rabbit2
environment:
- CLUSTERED=true
- CLUSTER_WITH=rabbit1

and in the folder holding this file, run:

  fig up

That is it!, the entire cluster should come up. If you need more nodes, just modify the fig.yml file.

The docker files for creating the dockerized rabbitmq-server is available at my github repo here: https://github.com/bijukunjummen/docker-rabbitmq-cluster and the "rabbitmq-server" image itself is here at the docker hub.

References:


Spring Caching abstraction and Google Guava Cache

$
0
0
Spring provides a great out of the box support for caching expensive method calls. The caching abstraction is covered in a great detail here.

My objective here is to cover one of the newer cache implementations that Spring now provides with 4.0+ version of the framework - using Google Guava Cache

In brief, consider a service which has a few slow methods:

public class DummyBookService implements BookService {

@Override
public Book loadBook(String isbn) {
// Slow method 1.

}

@Override
public List<Book> loadBookByAuthor(String author) {
// Slow method 2
}

}

With Spring Caching abstraction, repeated calls with the same parameter can be sped up by an annotation on the method along these lines - here the result of loadBook is being cached in to a "book" cache and listing of books cached into another "books" cache:

public class DummyBookService implements BookService {

@Override
@Cacheable("book")
public Book loadBook(String isbn) {
// slow response time..

}

@Override
@Cacheable("books")
public List<Book> loadBookByAuthor(String author) {
// Slow listing
}
}

Now, Caching abstraction support requires a CacheManager to be available which is responsible for managing the underlying caches to store the cached results, with the new Guava Cache support the CacheManager is along these lines:

@Bean
public CacheManager cacheManager() {
return new GuavaCacheManager("books", "book");
}

Google Guava Cache provides a rich API to be able to pre-load the cache, set eviction duration based on last access or created time, set the size of the cache etc, if the cache is to be customized then a guava CacheBuilder can be passed to the CacheManager for this customization:

@Bean
public CacheManager cacheManager() {
GuavaCacheManager guavaCacheManager = new GuavaCacheManager();
guavaCacheManager.setCacheBuilder(CacheBuilder.newBuilder().expireAfterAccess(30, TimeUnit.MINUTES));
return guavaCacheManager;
}

This works well if all the caches have a similar configuration, what if the caches need to be configured differently - for eg. in the sample above, I may want the "book" cache to never expire but the "books" cache to have an expiration of 30 mins, then the GuavaCacheManager abstraction does not work well, instead a better solution is actually to use a SimpleCacheManager which provides a more direct way to get to the cache and can be configured this way:

@Bean
public CacheManager cacheManager() {
SimpleCacheManager simpleCacheManager = new SimpleCacheManager();
GuavaCache cache1 = new GuavaCache("book", CacheBuilder.newBuilder().build());
GuavaCache cache2 = new GuavaCache("books", CacheBuilder.newBuilder()
.expireAfterAccess(30, TimeUnit.MINUTES)
.build());
simpleCacheManager.setCaches(Arrays.asList(cache1, cache2));
return simpleCacheManager;
}

This approach works very nicely, if required certain caches can be configured to be backed by a different caching engines itself, say a simple hashmap, some by Guava or EhCache some by distributed caches like Gemfire.


Spring boot based websocket application and capturing http session id

$
0
0
I was involved in a project recently where we needed to capture the http session id for a websocket request - the reason was to determine the number of websocket sessions utilizing the same underlying http session

The way to do this is based on a sample utilizing the new spring-session module and is described here.

The trick to capturing the http session id is in understanding that before a websocket connection is established between the browser and the server, there is a handshake phase negotiated over http and the session id is passed to the server during this handshake phase.

Spring Websocket support provides a nice way to register a HandShakeInterceptor, which can be used to capture the http session id and set this in the sub-protocol(typically STOMP) headers. First, this is the way to capture the session id and set it to a header:

public class HttpSessionIdHandshakeInterceptor implements HandshakeInterceptor {

@Override
public boolean beforeHandshake(ServerHttpRequest request, ServerHttpResponse response, WebSocketHandler wsHandler, Map<String, Object> attributes) throws Exception {
if (request instanceof ServletServerHttpRequest) {
ServletServerHttpRequest servletRequest = (ServletServerHttpRequest) request;
HttpSession session = servletRequest.getServletRequest().getSession(false);
if (session != null) {
attributes.put("HTTPSESSIONID", session.getId());
}
}
return true;
}

public void afterHandshake(ServerHttpRequest request, ServerHttpResponse response, WebSocketHandler wsHandler, Exception ex) {
}
}

And to register this HandshakeInterceptor with Spring Websocket support:

@Configuration
@EnableWebSocketMessageBroker
public class WebSocketDefaultConfig extends AbstractWebSocketMessageBrokerConfigurer {

@Override
public void configureMessageBroker(MessageBrokerRegistry config) {
config.enableSimpleBroker("/topic/", "/queue/");
config.setApplicationDestinationPrefixes("/app");
}

@Override
public void registerStompEndpoints(StompEndpointRegistry registry) {
registry.addEndpoint("/chat").withSockJS().setInterceptors(httpSessionIdHandshakeInterceptor());
}

@Bean
public HttpSessionIdHandshakeInterceptor httpSessionIdHandshakeInterceptor() {
return new HttpSessionIdHandshakeInterceptor();
}

}

Now that the session id is a part of the STOMP headers, this can be grabbed as a STOMP header, the following is a sample where it is being grabbed when subscriptions are registered to the server:

@Component
public class StompSubscribeEventListener implements ApplicationListener<SessionSubscribeEvent> {

private static final Logger logger = LoggerFactory.getLogger(StompSubscribeEventListener.class);

@Override
public void onApplicationEvent(SessionSubscribeEvent sessionSubscribeEvent) {
StompHeaderAccessor headerAccessor = StompHeaderAccessor.wrap(sessionSubscribeEvent.getMessage());
logger.info(headerAccessor.getSessionAttributes().get("HTTPSESSIONID").toString());
}
}

or it can be grabbed from a controller method handling websocket messages as a MessageHeaders parameter:

@MessageMapping("/chats/{chatRoomId}")
public void handleChat(@Payload ChatMessage message, @DestinationVariable("chatRoomId") String chatRoomId, MessageHeaders messageHeaders, Principal user) {
logger.info(messageHeaders.toString());
this.simpMessagingTemplate.convertAndSend("/topic/chats." + chatRoomId, "[" + getTimestamp() + "]:" + user.getName() + ":" + message.getMessage());
}

Here is a complete working sample which implements this pattern.

Spring boot war packaging

$
0
0
Spring boot recommends creating an executable jar with an embedded container(tomcat or jetty) during build time and using this executable jar as a standalone process at runtime. It is common however to deploy applications to an external container instead and Spring boot provides packaging the applications as a war specifically for this kind of a need.

My focus here is not to repeat the already detailed Spring Boot instructions on creating the war artifact, but on testing the created file to see if it would reliably work on a standalone container. I recently had an issue when creating a war from a Spring Boot project and deploying it on Jetty and this is essentially a learning from that experience.

The best way to test if the war will work reliably will be to simply use the jetty-maven and/or the tomcat maven plugin, with the following entries to the pom.xml file:

<plugin>
<groupId>org.apache.tomcat.maven</groupId>
<artifactId>tomcat7-maven-plugin</artifactId>
<version>2.2</version>
</plugin>
<plugin>
<groupId>org.eclipse.jetty</groupId>
<artifactId>jetty-maven-plugin</artifactId>
<version>9.2.3.v20140905</version>
</plugin>

With the plugins in place, starting up the war with the tomcat plugin:
mvn tomcat7:run

and with the jetty plugin:
mvn jetty:run

If there any issues with the way the war has been created, it should come out at start-up time with these containers. For eg, if I were to leave in the embedded tomcat dependencies:

<dependency>
<groupId>org.springframework.boot</groupId>
<artifactId>spring-boot-starter-tomcat</artifactId>
</dependency>

then when starting up the maven tomcat plugin, an error along these lines will show up:
java.lang.ClassCastException: org.springframework.web.SpringServletContainerInitializer cannot be cast to javax.servlet.ServletContainerInitializer

an indication of a servlet jar being packaged with the war file, fixed by specifying the scope as provided in the maven dependencies:
<dependency>
<groupId>org.springframework.boot</groupId>
<artifactId>spring-boot-starter-tomcat</artifactId>
<scope>provided</scope>
</dependency>

why both jetty and tomcat plugins, the reason is I saw a difference in behavior specifically with websocket support with jetty as the runtime and not in tomcat. So consider the websocket dependencies which are pulled in the following way:
<dependency>
<groupId>org.springframework.boot</groupId>
<artifactId>spring-boot-starter-websocket</artifactId>
</dependency>

This gave me an error when started up using the jetty runtime, and the fix again is to mark the underlying tomcat dependencies as provided, replace above with the following:

<dependency>
<groupId>org.springframework</groupId>
<artifactId>spring-websocket</artifactId>
</dependency>
<dependency>
<groupId>org.apache.tomcat.embed</groupId>
<artifactId>tomcat-embed-websocket</artifactId>
<scope>provided</scope>
</dependency>
<dependency>
<groupId>org.springframework</groupId>
<artifactId>spring-messaging</artifactId>
</dependency>

So to conclude, a quick way to verify if the war file produced for a Spring-boot application will cleanly deploy to a container(atleast tomcat and jetty) is to add the tomcat and jetty maven plugins and use these plugins to start the application up. Here is a sample project demonstrating this - https://github.com/bijukunjummen/spring-websocket-chat-sample.git

Externalizing session state for a Spring-boot application using spring-session

$
0
0
Spring-session is a very cool new project that aims to provide a simpler way of managing sessions in Java based web applications. One of the features that I explored with spring-session recently was the way it supports externalizing session state without needing to fiddle with the internals of specific web containers like Tomcat or Jetty.

To test spring-session I have used a shopping cart type application(available here) which makes heavy use of session by keeping the items added to the cart as a session attribute, as can be seen from these screenshots:


Consider first a scenario without Spring session. So this is how I have exposed my application:


I am using nginx to load balance across two instances of this application. This set-up is very easy to run using Spring boot, I brought up two instances of the app up using two different server ports, this way:

mvn spring-boot:run -Dserver.port=8080
mvn spring-boot:run -Dserver.port=8082

and this is my nginx.conf to load balance across these two instances:

events {
worker_connections 1024;
}
http {
upstream sessionApp {
server localhost:8080;
server localhost:8082;
}

server {
listen 80;

location / {
proxy_pass http://sessionApp;
}
}
}

I display the port number of the application in the footer just to show which instance is handling the request.

If I were to do nothing to move the state of the session out the application then the behavior of the application would be erratic as the session established on one instance of the application would not be recognized by the other instance - specifically if Tomcat receives a session id it does not recognize then the behavior is to create a new session.

Introducing Spring session into the application


There are container specific ways to introduce a external session stores - One example is here, where Redis is configured as a store for Tomcat. Pivotal Gemfire provides a module to externalize Tomcat's session state.

The advantage of using Spring-session is that there is no dependence on the container at all - maintaining session state becomes an application concern. The instructions on configuring an application to use Spring session is detailed very well at the Spring-session site, just to quickly summarize how I have configured my Spring Boot application, these are first the dependencies that I have pulled in:

<dependency>
<groupId>org.springframework.session</groupId>
<artifactId>spring-session</artifactId>
<version>1.0.0.BUILD-SNAPSHOT</version>
</dependency>
<dependency>
<groupId>org.springframework.session</groupId>
<artifactId>spring-session-data-redis</artifactId>
<version>1.0.0.BUILD-SNAPSHOT</version>
</dependency>
<dependency>
<groupId>org.springframework.data</groupId>
<artifactId>spring-data-redis</artifactId>
<version>1.4.1.RELEASE</version>
</dependency>
<dependency>
<groupId>redis.clients</groupId>
<artifactId>jedis</artifactId>
<version>2.4.1</version>
</dependency>


and my configuration to use Spring-session for session support, note the Spring Boot specific FilterRegistrationBean which is used to register the session repository filter:

mport org.springframework.boot.context.embedded.FilterRegistrationBean;
import org.springframework.context.annotation.Bean;
import org.springframework.context.annotation.Configuration;
import org.springframework.core.annotation.Order;
import org.springframework.data.redis.connection.jedis.JedisConnectionFactory;
import org.springframework.session.data.redis.config.annotation.web.http.EnableRedisHttpSession;
import org.springframework.session.web.http.SessionRepositoryFilter;
import org.springframework.web.filter.DelegatingFilterProxy;

import java.util.Arrays;

@Configuration
@EnableRedisHttpSession
public class SessionRepositoryConfig {

@Bean
@Order(value = 0)
public FilterRegistrationBean sessionRepositoryFilterRegistration(SessionRepositoryFilter springSessionRepositoryFilter) {
FilterRegistrationBean filterRegistrationBean = new FilterRegistrationBean();
filterRegistrationBean.setFilter(new DelegatingFilterProxy(springSessionRepositoryFilter));
filterRegistrationBean.setUrlPatterns(Arrays.asList("/*"));
return filterRegistrationBean;
}

@Bean
public JedisConnectionFactory connectionFactory() {
return new JedisConnectionFactory();
}
}


And that is it! magically now all session is handled by Spring-session, and neatly externalized to Redis.

If I were to retry my previous configuration of using nginx to load balance two different Spring-Boot applications using the common Redis store, the application just works irrespective of the instance handling the request. I look forward to further enhancements to this excellent new project.

The sample application which makes use of Spring-session is available here: https://github.com/bijukunjummen/shopping-cart-cf-app.git

Spring RestTemplate with a linked resource

$
0
0
Spring Data REST is an awesome project that provides mechanisms to expose the resources underlying a Spring Data based repository as REST resources.

Exposing a service with a linked resource


Consider two simple JPA based entities, Course and Teacher:

@Entity
@Table(name = "teachers")
public class Teacher {
@Id
@GeneratedValue(strategy = GenerationType.AUTO)
@Column(name = "id")
private Long id;

@Size(min = 2, max = 50)
@Column(name = "name")
private String name;

@Column(name = "department")
@Size(min = 2, max = 50)
private String department;
...
}

@Entity
@Table(name = "courses")
public class Course {
@Id
@GeneratedValue(strategy = GenerationType.AUTO)
@Column(name = "id")
private Long id;

@Size(min = 1, max = 10)
@Column(name = "coursecode")
private String courseCode;

@Size(min = 1, max = 50)
@Column(name = "coursename")
private String courseName;

@ManyToOne
@JoinColumn(name = "teacher_id")
private Teacher teacher;

....
}

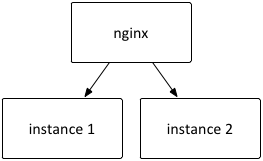
essentially the relation looks like this:

Now, all it takes to expose these entities as REST resources is adding a @RepositoryRestResource annotation on their JPA based Spring Data repositories this way, first for the "Teacher" resource:
import org.springframework.data.jpa.repository.JpaRepository;
import org.springframework.data.rest.core.annotation.RepositoryRestResource;
import univ.domain.Teacher;

@RepositoryRestResource
public interface TeacherRepo extends JpaRepository<Teacher, Long> {
}

and for exposing the Course resource:

@RepositoryRestResource
public interface CourseRepo extends JpaRepository<Course, Long> {
}

With this done and assuming a few teachers and a few courses are already in the datastore, a GET on courses would yield a response of the following type:

{
"_links" : {
"self" : {
"href" : "http://localhost:8080/api/courses{?page,size,sort}",
"templated" : true
}
},
"_embedded" : {
"courses" : [ {
"courseCode" : "Course1",
"courseName" : "Course Name 1",
"version" : 0,
"_links" : {
"self" : {
"href" : "http://localhost:8080/api/courses/1"
},
"teacher" : {
"href" : "http://localhost:8080/api/courses/1/teacher"
}
}
}, {
"courseCode" : "Course2",
"courseName" : "Course Name 2",
"version" : 0,
"_links" : {
"self" : {
"href" : "http://localhost:8080/api/courses/2"
},
"teacher" : {
"href" : "http://localhost:8080/api/courses/2/teacher"
}
}
} ]
},
"page" : {
"size" : 20,
"totalElements" : 2,
"totalPages" : 1,
"number" : 0
}
}

and a specific course looks like this:
{
"courseCode" : "Course1",
"courseName" : "Course Name 1",
"version" : 0,
"_links" : {
"self" : {
"href" : "http://localhost:8080/api/courses/1"
},
"teacher" : {
"href" : "http://localhost:8080/api/courses/1/teacher"
}
}
}

If you are wondering what the "_links", "_embedded" are - Spring Data REST uses Hypertext Application Language(or HAL for short) to represent the links, say the one between a course and a teacher.

HAL Based REST service - Using RestTemplate


Given this HAL based REST service, the question that I had in my mind was how to write a client to this service. I am sure there are better ways of doing this, but what follows worked for me and I welcome any cleaner ways of writing the client.

First, I modified the RestTemplate to register a custom Json converter that understands HAL based links:

public RestTemplate getRestTemplateWithHalMessageConverter() {
RestTemplate restTemplate = new RestTemplate();
List<HttpMessageConverter<?>> existingConverters = restTemplate.getMessageConverters();
List<HttpMessageConverter<?>> newConverters = new ArrayList<>();
newConverters.add(getHalMessageConverter());
newConverters.addAll(existingConverters);
restTemplate.setMessageConverters(newConverters);
return restTemplate;
}

private HttpMessageConverter getHalMessageConverter() {
ObjectMapper objectMapper = new ObjectMapper();
objectMapper.registerModule(new Jackson2HalModule());
MappingJackson2HttpMessageConverter halConverter = new TypeConstrainedMappingJackson2HttpMessageConverter(ResourceSupport.class);
halConverter.setSupportedMediaTypes(Arrays.asList(HAL_JSON));
halConverter.setObjectMapper(objectMapper);
return halConverter;
}

The Jackson2HalModule is provided by the Spring HATEOS project and understands HAL representation.


Given this shiny new RestTemplate, first let us create a Teacher entity:

Teacher teacher1 = new Teacher();
teacher1.setName("Teacher 1");
teacher1.setDepartment("Department 1");
URI teacher1Uri =
testRestTemplate.postForLocation("http://localhost:8080/api/teachers", teacher1);

Note that when the entity is created, the response is a http status code of 201 with the Location header pointing to the uri of the newly created resource, Spring RestTemplate provides a neat way of posting and getting hold of this Location header through an API. So now we have a teacher1Uri representing the newly created teacher.

Given this teacher URI, let us now retrieve the teacher, the raw json for the teacher resource looks like the following:
{
"name" : "Teacher 1",
"department" : "Department 1",
"version" : 0,
"_links" : {
"self" : {
"href" : "http://localhost:8080/api/teachers/1"
}
}
}

and to retrieve this using RestTemplate:
ResponseEntity<Resource<Teacher>> teacherResponseEntity
= testRestTemplate.exchange("http://localhost:8080/api/teachers/1", HttpMethod.GET, null, new ParameterizedTypeReference<Resource<Teacher>>() {
});

Resource<Teacher> teacherResource = teacherResponseEntity.getBody();

Link teacherLink = teacherResource.getLink("self");
String teacherUri = teacherLink.getHref();

Teacher teacher = teacherResource.getContent();

Jackson2HalModule is the one which helps unpack the links this cleanly and to get hold of the Teacher entity itself. I have previously explained ParameterizedTypeReference here.


Now, to a more tricky part, creating a Course.

Creating a course is tricky as it has a relation to the Teacher and representing this relation using HAL is not that straightforward. A raw POST to create the course would look like this:

 {
"courseCode" : "Course1",
"courseName" : "Course Name 1",
"version" : 0,
"teacher" : "http://localhost:8080/api/teachers/1"
}

Note how the reference to the teacher is a URI, this is how HAL represents an embedded reference specifically for a POST'ed content, so now to get this form through RestTemplate -

First to create a Course:

Course course1 = new Course();
course1.setCourseCode("Course1");
course1.setCourseName("Course Name 1");

At this point, it will be easier to handle providing the teacher link by dealing with a json tree representation and adding in the teacher link as the teacher uri:

ObjectMapper objectMapper = getObjectMapperWithHalModule();
ObjectNode jsonNodeCourse1 = (ObjectNode) objectMapper.valueToTree(course1);
jsonNodeCourse1.put("teacher", teacher1Uri.getPath());

and posting this should create the course with the linked teacher:

URI course1Uri = testRestTemplate.postForLocation(coursesUri, jsonNodeCourse1);

and to retrieve this newly created Course:

ResponseEntity<Resource<Course>> courseResponseEntity
= testRestTemplate.exchange(course1Uri, HttpMethod.GET, null, new ParameterizedTypeReference<Resource<Course>>() {
});

Resource<Course> courseResource = courseResponseEntity.getBody();
Link teacherLinkThroughCourse = courseResource.getLink("teacher");

This concludes how to use the RestTemplate to create and retrieve a linked resource, alternate ideas are welcome.

If you are interested in exploring this further, the entire sample is available at this github repo -  and the test is here


References:

Hypertext Application Language(or HAL for short)
HAL Specification
Spring RestTemplate

RabbitMQ - Processing messages serially using Spring integration Java DSL

$
0
0
If you ever have a need to process messages serially with RabbitMQ with a cluster of listeners processing the messages, the best way that I have seen is to use a "exclusive consumer" flag on a listener with 1 thread on each listener processing the messages.

Exclusive consumer flag ensures that only 1 consumer can read messages from the specific queue, and 1 thread on that consumer ensures that the messages are processed serially. There is a catch however, I will go over it later.

Let me demonstrate this behavior with a Spring Boot and Spring Integration based RabbitMQ message consumer.

First, this is the configuration for setting up a queue using Spring java configuration, note that since this is a Spring Boot application, it automatically creates a RabbitMQ connection factory when the Spring-amqp library is added to the list of dependencies:

@Configuration
@Configuration
public class RabbitConfig {

@Autowired
private ConnectionFactory rabbitConnectionFactory;

@Bean
public Queue sampleQueue() {
return new Queue("sample.queue", true, false, false);
}

}

Given this sample queue, a listener which gets the messages from this queue and processes them looks like this, the flow is written using the excellent Spring integration Java DSL library:

@Configuration
public class RabbitInboundFlow {
private static final Logger logger = LoggerFactory.getLogger(RabbitInboundFlow.class);

@Autowired
private RabbitConfig rabbitConfig;

@Autowired
private ConnectionFactory connectionFactory;

@Bean
public SimpleMessageListenerContainer simpleMessageListenerContainer() {
SimpleMessageListenerContainer listenerContainer = new SimpleMessageListenerContainer();
listenerContainer.setConnectionFactory(this.connectionFactory);
listenerContainer.setQueues(this.rabbitConfig.sampleQueue());
listenerContainer.setConcurrentConsumers(1);
listenerContainer.setExclusive(true);
return listenerContainer;
}

@Bean
public IntegrationFlow inboundFlow() {
return IntegrationFlows.from(Amqp.inboundAdapter(simpleMessageListenerContainer()))
.transform(Transformers.objectToString())
.handle((m) -> {
logger.info("Processed {}", m.getPayload());
})
.get();
}

}


The flow is very concisely expressed in the inboundFlow method, a message payload from RabbitMQ is transformed from byte array to String and finally processed by simply logging the message to the logs

The important part of the flow is the listener configuration, note the flag which sets the consumer to be an exclusive consumer and within this consumer the number of threads processing is set to 1. Given this even if multiple instances of the application is started up only 1 of the listeners will be able to connect and process messages.


Now for the catch, consider a case where the processing of messages takes a while to complete and rolls back during processing of the message. If the instance of the application handling the message were to be stopped in the middle of processing such a message, then the behavior is a different instance will start handling the messages in the queue, when the stopped instance rolls back the message, the rolled back message is then delivered to the new exclusive consumer, thus getting a message out of order.

If you are interested in exploring this further, here is a github project to play with this feature: https://github.com/bijukunjummen/test-rabbit-exclusive

Solving "Water buckets" problem using Scala

$
0
0
I recently came across a puzzle called the "Water Buckets" problem in this book, which totally stumped me.


You have a 12-gallon bucket, an 8-gallon bucket and a 5-gallon bucket. The 12-gallon bucket is full of water and the other two are empty. Without using any additional water how can you divide the twelve gallons of water equally so that two of the three buckets have exactly 6 gallons of water in them?


I and my nephew spent a good deal of time trying to solve it and ultimately gave up.

I remembered then that I have seen a programmatic solution to a similar puzzle being worked out in the "Functional Programming Principles in Scala" Coursera course by Martin Odersky.

This is the gist to the solution completely copied from the course:


and running this program spits out the following 7 step solution! (index 0 is the 12-gallon bucket, 1 is the 8-gallon bucket and 2 is the 5-gallon bucket)

Pour(0,1) 
Pour(1,2)
Pour(2,0)
Pour(1,2)
Pour(0,1)
Pour(1,2)
Pour(2,0)

If you are interested in learning more about the code behind this solution, the best way is to follow the week 7 of the Coursera course that I have linked above, Martin Odersky does a fantastic job of seemingly coming up with a solution on the fly!.


Spring retry - ways to integrate with your project

$
0
0
If you have a need to implement robust retry logic in your code, a proven way would be to use the spring retry library. My objective here is not to show how to use the spring retry project itself, but in demonstrating different ways that it can be integrated into your codebase.

Consider a service to invoke an external system:

package retry.service;

public interface RemoteCallService {
String call() throws Exception;
}


Assume that this call can fail and you want the call to be retried thrice with a 2 second delay each time the call fails, so to simulate this behavior I have defined a mock service using Mockito this way, note that this is being returned as a mocked Spring bean:

@Bean
public RemoteCallService remoteCallService() throws Exception {
RemoteCallService remoteService = mock(RemoteCallService.class);
when(remoteService.call())
.thenThrow(new RuntimeException("Remote Exception 1"))
.thenThrow(new RuntimeException("Remote Exception 2"))
.thenReturn("Completed");
return remoteService;
}
So essentially this mocked service fails 2 times and succeeds with the third call.

And this is the test for the retry logic:

public class SpringRetryTests {

@Autowired
private RemoteCallService remoteCallService;

@Test
public void testRetry() throws Exception {
String message = this.remoteCallService.call();
verify(remoteCallService, times(3)).call();
assertThat(message, is("Completed"));
}
}

We are ensuring that the service is called 3 times to account for the first two failed calls and the third call which succeeds.

If we were to directly incorporate spring-retry at the point of calling this service, then the code would have looked like this:
@Test
public void testRetry() throws Exception {
String message = this.retryTemplate.execute(context -> this.remoteCallService.call());
verify(remoteCallService, times(3)).call();
assertThat(message, is("Completed"));
}

This is not ideal however, a better way would be where the callers don't have have to be explicitly aware of the fact that there is a retry logic in place.

Given this, the following are the approaches to incorporate Spring-retry logic.

Approach 1: Custom Aspect to incorporate Spring-retry

This approach should be fairly intuitive as the retry logic can be considered a cross cutting concern and a good way to implement a cross cutting concern is using Aspects. An aspect which incorporates the Spring-retry would look something along these lines:

package retry.aspect;

import org.aspectj.lang.ProceedingJoinPoint;
import org.aspectj.lang.annotation.Around;
import org.aspectj.lang.annotation.Aspect;
import org.aspectj.lang.annotation.Pointcut;
import org.slf4j.Logger;
import org.slf4j.LoggerFactory;
import org.springframework.beans.factory.annotation.Autowired;
import org.springframework.retry.support.RetryTemplate;

@Aspect
public class RetryAspect {

private static Logger logger = LoggerFactory.getLogger(RetryAspect.class);

@Autowired
private RetryTemplate retryTemplate;

@Pointcut("execution(* retry.service..*(..))")
public void serviceMethods() {
//
}

@Around("serviceMethods()")
public Object aroundServiceMethods(ProceedingJoinPoint joinPoint) {
try {
return retryTemplate.execute(retryContext -> joinPoint.proceed());
} catch (Throwable e) {
throw new RuntimeException(e);
}
}
}

This aspect intercepts the remote service call and delegates the call to the retryTemplate. A full working test is here.

Approach 2: Using Spring-retry provided advice

Out of the box Spring-retry project provides an advice which takes care of ensuring that targeted services can be retried. The AOP configuration to weave the advice around the service requires dealing with raw xml as opposed to the previous approach where the aspect can be woven using Spring Java configuration. The xml configuration looks like this:

<?xml version="1.0" encoding="UTF-8"?>
<beans xmlns="http://www.springframework.org/schema/beans"
xmlns:xsi="http://www.w3.org/2001/XMLSchema-instance"
xmlns:aop="http://www.springframework.org/schema/aop"
xsi:schemaLocation="
http://www.springframework.org/schema/aop http://www.springframework.org/schema/aop/spring-aop.xsd
http://www.springframework.org/schema/beans http://www.springframework.org/schema/beans/spring-beans.xsd">

<aop:config>
<aop:pointcut id="transactional"
expression="execution(* retry.service..*(..))" />
<aop:advisor pointcut-ref="transactional"
advice-ref="retryAdvice" order="-1"/>
</aop:config>

</beans>

The full working test is here.

Approach 3: Declarative retry logic

This is the recommended approach, you will see that the code is far more concise than with the previous two approaches. With this approach, the only thing that needs to be done is to declaratively indicate which methods need to be retried:

package retry.service;

import org.springframework.retry.annotation.Backoff;
import org.springframework.retry.annotation.Retryable;

public interface RemoteCallService {
@Retryable(maxAttempts = 3, backoff = @Backoff(delay = 2000))
String call() throws Exception;
}

and a full test which makes use of this declarative retry logic, also available here:

package retry;

import org.junit.Test;
import org.junit.runner.RunWith;
import org.springframework.beans.factory.annotation.Autowired;
import org.springframework.context.annotation.Bean;
import org.springframework.context.annotation.Configuration;
import org.springframework.retry.annotation.EnableRetry;
import org.springframework.test.context.ContextConfiguration;
import org.springframework.test.context.junit4.SpringJUnit4ClassRunner;
import retry.service.RemoteCallService;

import static org.hamcrest.MatcherAssert.assertThat;
import static org.hamcrest.Matchers.is;
import static org.mockito.Mockito.*;


@RunWith(SpringJUnit4ClassRunner.class)
@ContextConfiguration
public class SpringRetryDeclarativeTests {

@Autowired
private RemoteCallService remoteCallService;

@Test
public void testRetry() throws Exception {
String message = this.remoteCallService.call();
verify(remoteCallService, times(3)).call();
assertThat(message, is("Completed"));
}

@Configuration
@EnableRetry
public static class SpringConfig {

@Bean
public RemoteCallService remoteCallService() throws Exception {
RemoteCallService remoteService = mock(RemoteCallService.class);
when(remoteService.call())
.thenThrow(new RuntimeException("Remote Exception 1"))
.thenThrow(new RuntimeException("Remote Exception 2"))
.thenReturn("Completed");
return remoteService;
}
}
}

The @EnableRetry annotation activates the processing of @Retryable annotated methods and internally uses logic along the lines of approach 2 without the end user needing to be explicit about it.

I hope this gives you a slightly better taste for how to incorporate Spring-retry in your project. All the code that I have demonstrated here is also available in my github project here: https://github.com/bijukunjummen/test-spring-retry

Using Netflix Hystrix annotations with Spring

$
0
0
I can't think of a better way to describe a specific feature of Netflix Hystrix library than by quoting from its home page:

Latency and Fault Tolerance by:
Stop cascading failures. Fallbacks and graceful degradation. Fail fast and rapid recovery.

Thread and semaphore isolation with circuit breakers.

I saw a sample demonstrated by Josh Long(@starbuxman) which makes use of Hystrix integrated with Spring - the specific code is here. The sample makes use of annotations to hystrix enable a service class.

My objective here is to recreate a similar set-up in a smaller unit test mode. With that in mind, consider the following interface which is going to be made fault tolerant using Hystrix library:

package hystrixtest;

public interface RemoteCallService {

String call(String request) throws Exception;

}

And a dummy implementation for it. The dummy implementation delegates to a mock implementation which in-turn fails the first two times it is called and succeeds with the third call:

package hystrixtest;

import com.netflix.hystrix.contrib.javanica.annotation.HystrixCommand;
import org.mockito.invocation.InvocationOnMock;
import org.mockito.stubbing.Answer;

import static org.mockito.Mockito.*;


public class DummyRemoteCallService implements RemoteCallService {

private RemoteCallService mockedDelegate;

public DummyRemoteCallService() {
try {
mockedDelegate = mock(RemoteCallService.class);
when(mockedDelegate.call(anyString()))
.thenThrow(new RuntimeException("Deliberately throwing an exception 1"))
.thenThrow(new RuntimeException("Deliberately throwing an exception 2"))
.thenAnswer(new Answer<String>() {
@Override
public String answer(InvocationOnMock invocationOnMock) throws Throwable {
return (String) invocationOnMock.getArguments()[0];
}
});
}catch(Exception e) {
throw new IllegalStateException(e);
}
}

@Override
@HystrixCommand(fallbackMethod = "fallBackCall")
public String call(String request) throws Exception {
return this.mockedDelegate.call(request);
}

public String fallBackCall(String request) {
return "FALLBACK: " + request;
}
}

The remote call has been annotated with the @Hystrixcommand annotation with a basic configuration to fall back to a "fallBackCall" method in case of a failed remote call.

Now, as you can imagine, there has to be something in the Hystrix library which should intercept calls annotated with @HystrixCommand annotation and makes it fault tolerant. This is a working test which wraps the necessary infrastructure together - in essence, Hystrix library provides a companion AOP based library that intercepts the calls. I have used Spring testing support here to bootstrap the AOP infrastructure, to create the HystrixCommandAspect as a bean, the call goes to the "fallBackCall" for the first two failed calls and succeeds the third time around:


package hystrixtest;

import com.netflix.hystrix.contrib.javanica.aop.aspectj.HystrixCommandAspect;
import org.junit.Test;
import org.junit.runner.RunWith;
import org.springframework.beans.factory.annotation.Autowired;
import org.springframework.context.annotation.Bean;
import org.springframework.context.annotation.Configuration;
import org.springframework.context.annotation.EnableAspectJAutoProxy;
import org.springframework.test.context.ContextConfiguration;
import org.springframework.test.context.junit4.SpringJUnit4ClassRunner;

import static org.hamcrest.MatcherAssert.assertThat;
import static org.hamcrest.Matchers.is;


@RunWith(SpringJUnit4ClassRunner.class)
@ContextConfiguration
public class TestRemoteCallServiceHystrix {

@Autowired
private RemoteCallService remoteCallService ;

@Test
public void testRemoteCall() throws Exception{
assertThat(this.remoteCallService.call("test"), is("FALLBACK: test"));
assertThat(this.remoteCallService.call("test"), is("test"));
}

@Configuration
@EnableAspectJAutoProxy
public static class SpringConfig {

@Bean
public HystrixCommandAspect hystrixCommandAspect() {
return new HystrixCommandAspect();
}

@Bean
public RemoteCallService remoteCallService() {
return new DummyRemoteCallService();
}
}
}

Spring-Cloud provides an easier way to configure the Netflix libraries for Spring-Boot based projects and if I were to use this library the test would transform to this, a bunch of configuration is now commented out with the help of Spring-Boot:

package hystrixtest;

import org.junit.Test;
import org.junit.runner.RunWith;
import org.springframework.beans.factory.annotation.Autowired;
import org.springframework.boot.autoconfigure.EnableAutoConfiguration;
import org.springframework.boot.test.SpringApplicationConfiguration;
import org.springframework.cloud.netflix.hystrix.EnableHystrix;
import org.springframework.context.annotation.Bean;
import org.springframework.context.annotation.Configuration;
import org.springframework.test.context.junit4.SpringJUnit4ClassRunner;

import static org.hamcrest.MatcherAssert.assertThat;
import static org.hamcrest.Matchers.is;


@RunWith(SpringJUnit4ClassRunner.class)
@SpringApplicationConfiguration
public class TestRemoteCallServiceHystrix {

@Autowired
private RemoteCallService remoteCallService;

@Test
public void testRemoteCall() throws Exception {
assertThat(this.remoteCallService.call("test"), is("FALLBACK: test"));
assertThat(this.remoteCallService.call("test"), is("test"));
}

@Configuration
@EnableAutoConfiguration
// @EnableAspectJAutoProxy
@EnableHystrix
public static class SpringConfig {

// @Bean
// public HystrixCommandAspect hystrixCommandAspect() {
// return new HystrixCommandAspect();
// }

@Bean
public RemoteCallService remoteCallService() {
return new DummyRemoteCallService();
}
}
}

If you are interested in exploring this sample further, here is the github repo with the working tests.

Learning Netflix Governator - Part 1

$
0
0
I have been working with Netflix Governator for the last few days and got to try out a small sample using Governator as a way to compare it with the dependency injection feature set of Spring Framework. The following is by no means comprehensive, I will expand on this in the next series of posts.

So Governator for the uninitiated is an extension to Google Guice enhancing it with some Spring like features, to quote the Governator site:

classpath scanning and automatic binding, lifecycle management, configuration to field mapping, field validation and parallelized object warmup.

Here I will demonstrate two features, classpath scanning and automatic binding.

Basic Dependency Injection

Consider a BlogService, depending on a BlogDao:

public class DefaultBlogService implements BlogService {
private final BlogDao blogDao;

public DefaultBlogService(BlogDao blogDao) {
this.blogDao = blogDao;
}

@Override
public BlogEntry get(long id) {
return this.blogDao.findById(id);
}
}

If I were using Spring to define the dependency between these two components, the following would be the configuration:

package sample.spring;

import org.springframework.context.annotation.Bean;
import org.springframework.context.annotation.Configuration;
import sample.dao.BlogDao;
import sample.service.BlogService;

@Configuration
public class SampleConfig {

@Bean
public BlogDao blogDao() {
return new DefaultBlogDao();
}

@Bean
public BlogService blogService() {
return new DefaultBlogService(blogDao());
}
}

In Spring, the dependency configuration is specified in a class annotated with @Configuration annotation. The methods annotated with @Bean return the components, note how the blogDao is being injected through constructor injection in blogService method.

A unit test for this configuration is the following:

package sample.spring;

import org.junit.Test;
import org.springframework.context.annotation.AnnotationConfigApplicationContext;
import sample.service.BlogService;

import static org.hamcrest.MatcherAssert.*;
import static org.hamcrest.Matchers.*;

public class SampleSpringExplicitTest {

@Test
public void testSpringInjection() {
AnnotationConfigApplicationContext context = new AnnotationConfigApplicationContext();
context.register(SampleConfig.class);
context.refresh();

BlogService blogService = context.getBean(BlogService.class);
assertThat(blogService.get(1l), is(notNullValue()));
context.close();
}

}


Note that Spring provides good support for unit testing, a better test would be the following:

package sample.spring;

package sample.spring;

import org.junit.Test;
import org.junit.runner.RunWith;
import org.springframework.beans.factory.annotation.Autowired;
import org.springframework.context.annotation.ComponentScan;
import org.springframework.context.annotation.Configuration;
import org.springframework.test.context.ContextConfiguration;
import org.springframework.test.context.junit4.SpringJUnit4ClassRunner;
import sample.service.BlogService;

import static org.hamcrest.MatcherAssert.*;
import static org.hamcrest.Matchers.*;


@RunWith(SpringJUnit4ClassRunner.class)
@ContextConfiguration
public class SampleSpringAutowiredTest {

@Autowired
private BlogService blogService;

@Test
public void testSpringInjection() {
assertThat(blogService.get(1l), is(notNullValue()));
}

@Configuration
@ComponentScan("sample.spring")
public static class SpringConig {

}

}


This is basic dependency injection, so to specify such a dependency Governator itself is not required, Guice is sufficient, this is how the configuration would look using Guice Modules:

package sample.guice;

import com.google.inject.AbstractModule;
import sample.dao.BlogDao;
import sample.service.BlogService;

public class SampleModule extends AbstractModule{

@Override
protected void configure() {
bind(BlogDao.class).to(DefaultBlogDao.class);
bind(BlogService.class).to(DefaultBlogService.class);
}
}

and a Unit test for this configuration is the following:


package sample.guice;

import com.google.inject.Guice;
import com.google.inject.Injector;
import org.junit.Test;
import sample.service.BlogService;

import static org.hamcrest.Matchers.*;
import static org.hamcrest.MatcherAssert.*;

public class SampleModuleTest {

@Test
public void testExampleBeanInjection() {
Injector injector = Guice.createInjector(new SampleModule());
BlogService blogService = injector.getInstance(BlogService.class);
assertThat(blogService.get(1l), is(notNullValue()));
}

}


Classpath Scanning and Autobinding

Classpath scanning is a way to detect the components by looking for markers in the classpath. A sample with Spring should clarify this:

@Repository
public class DefaultBlogDao implements BlogDao {
....
}

@Service
public class DefaultBlogService implements BlogService {

private final BlogDao blogDao;

@Autowired
public DefaultBlogService(BlogDao blogDao) {
this.blogDao = blogDao;
}
...
}

Here the annotations @Service, @Repository are used as markers to indicate that these are components and the dependencies are specified by the @Autowired annotation on the constructor of the DefaultBlogService.

Given this the configuration is now simplified, we just need to provide the package name that should be scanned for such annotated components and this is how a full test would look:
package sample.spring;
...
@RunWith(SpringJUnit4ClassRunner.class)
@ContextConfiguration
public class SampleSpringAutowiredTest {

@Autowired
private BlogService blogService;

@Test
public void testSpringInjection() {
assertThat(blogService.get(1l), is(notNullValue()));
}

@Configuration
@ComponentScan("sample.spring")
public static class SpringConig {}
}


Governator provides a similar kind of a support:
@AutoBindSingleton(baseClass = BlogDao.class)
public class DefaultBlogDao implements BlogDao {
....
}

@AutoBindSingleton(baseClass = BlogService.class)
public class DefaultBlogService implements BlogService {
private final BlogDao blogDao;

@Inject
public DefaultBlogService(BlogDao blogDao) {
this.blogDao = blogDao;
}
....
}

Here, @AutoBindSingleton annotation is being used as a marker annotation to define the guice binding, given this a test with classpath scanning is the following:

package sample.gov;

import com.google.inject.Injector;
import com.netflix.governator.guice.LifecycleInjector;
import com.netflix.governator.lifecycle.LifecycleManager;
import org.junit.Test;
import sample.service.BlogService;

import static org.hamcrest.MatcherAssert.assertThat;
import static org.hamcrest.Matchers.is;
import static org.hamcrest.Matchers.notNullValue;

public class SampleWithGovernatorTest {

@Test
public void testExampleBeanInjection() throws Exception {
Injector injector = LifecycleInjector
.builder()
.withModuleClass(SampleModule.class)
.usingBasePackages("sample.gov")
.build()
.createInjector();

LifecycleManager manager = injector.getInstance(LifecycleManager.class);

manager.start();

BlogService blogService = injector.getInstance(BlogService.class);
assertThat(blogService.get(1l), is(notNullValue()));
}

}

See how the package to be scanned is specified using a LifecycleInjector component of Governator, this autodetects the components and wires them together.

Just to wrap the classpath scanning and Autobinding features, Governator like Spring provides a support for junit testing and a better test would be the following:

package sample.gov;

import com.google.inject.Injector;
import com.netflix.governator.guice.LifecycleTester;
import org.junit.Rule;
import org.junit.Test;
import sample.service.BlogService;

import static org.hamcrest.MatcherAssert.*;
import static org.hamcrest.Matchers.*;

public class SampleWithGovernatorJunitSupportTest {

@Rule
public LifecycleTester tester = new LifecycleTester();

@Test
public void testExampleBeanInjection() throws Exception {
tester.start();
Injector injector = tester
.builder()
.usingBasePackages("sample.gov")
.build()
.createInjector();

BlogService blogService = injector.getInstance(BlogService.class);
assertThat(blogService.get(1l), is(notNullValue()));
}

}

Conclusion
If you are interested in exploring this further I have a sample in this github project, I would be expanding this project as I learn more about Governator

Learning Netflix Governator - Part 2

$
0
0
To continue from the previous entry on some basic learnings on Netflix Governator, here I will cover one more enhancement that Netflix Governator brings to Google Guice - Lifecycle Management

Lifecycle Management essentially provides hooks into the different lifecycle phases that an object is taken through, to quote the wiki article on Governator:

Allocation (via Guice)
|
v
Pre Configuration
|
v
Configuration
|
V
Set Resources
|
V
Post Construction
|
V
Validation and Warm Up
|
V
-- application runs until termination, then... --
|
V
Pre Destroy

To illustrate this, consider the following code:

package sample.gov;

import com.google.inject.Inject;
import com.netflix.governator.annotations.AutoBindSingleton;
import sample.dao.BlogDao;
import sample.model.BlogEntry;
import sample.service.BlogService;

import javax.annotation.PostConstruct;
import javax.annotation.PreDestroy;

@AutoBindSingleton(baseClass = BlogService.class)
public class DefaultBlogService implements BlogService {
private final BlogDao blogDao;

@Inject
public DefaultBlogService(BlogDao blogDao) {
this.blogDao = blogDao;
}

@Override
public BlogEntry get(long id) {
return this.blogDao.findById(id);
}

@PostConstruct
public void postConstruct() {
System.out.println("Post-construct called!!");
}
@PreDestroy
public void preDestroy() {
System.out.println("Pre-destroy called!!");
}
}

Here two methods have been annotated with @PostConstruct and @PreDestroy annotations to hook into these specific phases of the Governator's lifecycle for this object. The neat thing is that these annotations are not Governator specific but are JSR-250 annotations that are now baked into the JDK.

Calling the test for this class appropriately calls the annotated methods, here is a sample test:

mport com.google.inject.Injector;
import com.netflix.governator.guice.LifecycleInjector;
import com.netflix.governator.lifecycle.LifecycleManager;
import org.junit.Test;
import sample.service.BlogService;

import static org.hamcrest.MatcherAssert.*;
import static org.hamcrest.Matchers.*;

public class SampleWithGovernatorTest {

@Test
public void testExampleBeanInjection() throws Exception {
Injector injector = LifecycleInjector
.builder()
.withModuleClass(SampleModule.class)
.usingBasePackages("sample.gov")
.build()
.createInjector();

LifecycleManager manager = injector.getInstance(LifecycleManager.class);

manager.start();

BlogService blogService = injector.getInstance(BlogService.class);
assertThat(blogService.get(1l), is(notNullValue()));
manager.close();
}

}

Spring Framework has supported a similar mechanism for a long time - so the exact same JSR-250 based annotations work for Spring bean too.

If you are interested in exploring this further, here is my github project with samples with Lifecycle management.

Disambiguating between instances with Google Guice

$
0
0
Google guice provides a neat way to select a target implementation if there are multiple implementations of an interface. My samples are based on an excellent article by Josh Long(@starbuxman) on a similar mechanism that Spring provides.

So, consider an interface called MarketPlace having two implementations, an AndroidMarketPlace and AppleMarketPlace:

interface MarketPlace {
}

class AppleMarketPlace implements MarketPlace {

@Override
public String toString() {
return "apple";
}
}

class GoogleMarketPlace implements MarketPlace {

@Override
public String toString() {
return "android";
}
}

and consider a user of these implementations:

class MarketPlaceUser {
private final MarketPlace marketPlace;

public MarketPlaceUser(MarketPlace marketPlace) {
System.out.println("MarketPlaceUser constructor called..");
this.marketPlace = marketPlace;
}

public String showMarketPlace() {
return this.marketPlace.toString();
}

}

A good way for MarketPlaceUser to disambiguate between these implementations is to use a guice feature called Binding Annotations. To make use of this feature, start by defining annotations for each of these implementations this way:

@Retention(RetentionPolicy.RUNTIME)
@Target({ElementType.FIELD, ElementType.PARAMETER})
@BindingAnnotation
@interface Android {}

@Retention(RetentionPolicy.RUNTIME)
@Target({ElementType.FIELD, ElementType.PARAMETER})
@BindingAnnotation
@interface Ios {}

and inform the Guice binder about these annotations and the appropriate implementation corresponding to the annotation:

class MultipleInstancesModule extends AbstractModule {

@Override
protected void configure() {
bind(MarketPlace.class).annotatedWith(Ios.class).to(AppleMarketPlace.class).in(Scopes.SINGLETON);
bind(MarketPlace.class).annotatedWith(Android.class).to(GoogleMarketPlace.class).in(Scopes.SINGLETON);
bind(MarketPlaceUser.class).in(Scopes.SINGLETON);
}
}

Now, if MarketPlaceUser needs to use one or the other implementation, this is how the dependency can be injected in:

import com.google.inject.*;

class MarketPlaceUser {
private final MarketPlace marketPlace;

@Inject
public MarketPlaceUser(@Ios MarketPlace marketPlace) {
this.marketPlace = marketPlace;
}

}

This is very intuitive. If you have concerns about defining so many annotations, another approach could be to use @Named built-in Google Guice annotation, this way:

class MultipleInstancesModule extends AbstractModule {

@Override
protected void configure() {
bind(MarketPlace.class).annotatedWith(Names.named("ios")).to(AppleMarketPlace.class).in(Scopes.SINGLETON);
bind(MarketPlace.class).annotatedWith(Names.named("android")).to(GoogleMarketPlace.class).in(Scopes.SINGLETON);
bind(MarketPlaceUser.class).in(Scopes.SINGLETON);
}
}

and use it this way, where the dependency is required:

import com.google.inject.*;

class MarketPlaceUser {
private final MarketPlace marketPlace;

@Inject
public MarketPlaceUser(@Named("ios") MarketPlace marketPlace) {
this.marketPlace = marketPlace;
}

}

If you are interested in exploring this further, here is the Google guice sample and an equivalent sample using Spring framework

Netflix Governator Tests - Introducing governator-junit-runner

$
0
0
Consider a typical Netflix Governator junit test.

public class SampleWithGovernatorJunitSupportTest {

@Rule
public LifecycleTester tester = new LifecycleTester();

@Test
public void testExampleBeanInjection() throws Exception {
tester.start();
Injector injector = tester
.builder()
.withBootstrapModule(new SampleBootstrapModule())
.withModuleClass(SampleModule.class)
.usingBasePackages("sample.gov")
.build()
.createInjector();

BlogService blogService = injector.getInstance(BlogService.class);
assertThat(blogService.get(1l), is(notNullValue()));
assertThat(blogService.getBlogServiceName(), equalTo("Test Blog Service"));
}

}

This test is leveraging the Junit rule support provided by Netflix Governator and tests some of the feature sets of Governator - Bootstrap modules, package scanning, configuration support etc.

The test however has quite a lot of boilerplate code which I felt could be reduced by instead leveraging a Junit Runner type model. As a proof of this concept, I am introducing the unimaginatively named project - governator-junit-runner, consider now the same test re-written using this library:

@RunWith(GovernatorJunit4Runner.class)
@LifecycleInjectorParams(modules = SampleModule.class, bootstrapModule = SampleBootstrapModule.class, scannedPackages = "sample.gov")
public class SampleGovernatorRunnerTest {

@Inject
private BlogService blogService;

@Test
public void testExampleBeanInjection() throws Exception {
assertNotNull(blogService.get(1l));
assertEquals("Test Blog Service", blogService.getBlogServiceName());
}

}

Most of the boilerplate is now implemented within the Junit runner and the parameters required to bootstrap Governator is passed in through the LifecycleInjectorParams annotation. The test instance itself is a bound component and thus can be injected into, this way the instances which need to be tested can be injected into the test itself and asserted on. If you want more fine-grained control, the LifecycleManager itself can be injected into the test!:

@Inject
private Injector injector;

@Inject
private LifecycleManager lifecycleManager;

If this interests you, more samples are at the project site here.

Standing up a local Netflix Eureka

$
0
0
Here I will consider two different ways of standing up a local instance of Netflix Eureka. If you are not familiar with Eureka, it provides a central registry where (micro)services can register themselves and client applications can use this registry to look up specific instances hosting a service and to make the service calls.

Approach 1: Native Eureka Library

The first way is to simply use the archive file generated by the Netflix Eureka build process:

1. Clone the Eureka source repository here: https://github.com/Netflix/eureka
2. Run "./gradlew build" at the root of the repository, this should build cleanly generating a war file in eureka-server/build/libs folder
3. Grab this file, rename it to "eureka.war" and place it in the webapps folder of either tomcat or jetty. For this exercise I have used jetty.
4. Start jetty, by default jetty will boot up at port 8080, however I wanted to instead bring it up at port 8761, so you can start it up this way, "java -jar start.jar -Djetty.port=8761"

The server should start up cleanly and can be verified at this endpoint - "http://localhost:8761/eureka/v2/apps"


Approach 2: Spring-Cloud-Netflix


Spring-Cloud-Netflix provides a very neat way to bootstrap Eureka. To bring up Eureka server using Spring-Cloud-Netflix the approach that I followed was to clone the sample Eureka server application available here: https://github.com/spring-cloud-samples/eureka

1. Clone this repository
2. From the root of the repository run "mvn spring-boot:run", and that is it!.

The server should boot up cleanly and the REST endpoint should come up here: "http://localhost:8761/eureka/apps". As a bonus, Spring-Cloud-Netflix provides a neat UI showing the various applications who have registered with Eureka at the root of the webapp at "http://localhost:8761/".

Just a few small issues to be aware of, note that the context url's are a little different in the two cases "eureka/v2/apps" vs "eureka/apps", this can be adjusted on the configurations of the services which register with Eureka.

Conclusion


Your mileage with these approaches may vary. I have found Spring-Cloud-Netflix a little unstable at times but it has mostly worked out well for me. The documentation at the Spring-Cloud site is also far more exhaustive than the one provided at the Netflix Eureka site.

Async abstractions using rx-java

$
0
0
One of the big benefits in using Rx-java for me has been the way the code looks exactly the same whether the underlying calls are synchronous or asynchronous and hence the title of this entry.

Consider a very simple use case of a client code making three slow running calls and combines the results into a list:

String op1 = service1.operation();
String op2 = service2.operation();
String op3 = service3.operation();
Arrays.asList(op1, op2, op3)

Since the calls are synchronous the time taken to do this would be additive. To simulate a slow call the following is the type of implementation in each of method calls:

public String operation() {
logger.info("Start: Executing slow task in Service 1");
Util.delay(7000);
logger.info("End: Executing slow task in Service 1");
return "operation1"
}

So the first attempt at using rx-java with these implementations is to simply have these long running operations return the versatile type Observable, a bad implementation would look like this:

public Observable<string> operation() {
logger.info("Start: Executing slow task in Service 1");
Util.delay(7000);
logger.info("End: Executing slow task in Service 1");
return Observable.just("operation 1");
}

So with this the caller implementation changes to the following:

Observable<String> op1 = service1.operation();
Observable<String> op2 = service2.operation();
Observable<String> op3 = service3.operation();

Observable<List<String>> lst = Observable.merge(op1, op2, op3).toList();


See how the caller composes the results using the merge method.

However the calls to each of the service calls is still synchronous at this point, to make the call asynch the service calls can be made to use a Thread pool, the following way:

public class Service1 {
private static final Logger logger = LoggerFactory.getLogger(Service1.class);
public Observable<String> operation() {
return Observable.<String>create(s -> {
logger.info("Start: Executing slow task in Service 1");
Util.delay(7000);
s.onNext("operation 1");
logger.info("End: Executing slow task in Service 1");
s.onCompleted();
}).subscribeOn(Schedulers.computation());
}
}

subscribeOn uses the specified Scheduler to run the actual operation.

The beauty of the approach is that the calling code of this service is not changed at all, the implementation there remains exactly same as before whereas the service calls are now asynchronous. If you are interested in exploring this sample further, here is a github repo with working examples.

Java 8 Stream to Rx-Java Observable

$
0
0
I was recently looking at a way to convert a Java 8 Stream to Rx-JavaObservable.

There is one api in Observable that appears to do this :

public static final <T> Observable<T> from(java.lang.Iterable<? extends T> iterable)

So now the question is how do we transform a Stream to an Iterable. Stream does not implement the Iterable interface, and there are good reasons for this. So to return an Iterable from a Stream, you can do the following:

Iterable iterable = new Iterable() {
@Override
public Iterator iterator() {
return aStream.iterator();
}
};

Observable.from(iterable);

Since Iterable is a Java 8 functional interface, this can be simplified to the following using Java 8 Lambda expressions!:

Observable.from(aStream::iterator);

First look it does appear cryptic, however if it is seen as a way to simplify the expanded form of Iterable then it slowly starts to make sense.

Reference:
This is entirely based on what I read on this Stackoverflow question.

Netflix Archaius properties in a Spring project

$
0
0

Archaius Basics


Netflix Archaius is a library for managing configuration for an application. Consider a properties file "sample.properties" holding a property called "myprop":

myprop=myprop_value_default

This is how the file is loaded up using Archaius:

ConfigurationManager
.loadCascadedPropertiesFromResources("sample");

String myProp = DynamicPropertyFactory.getInstance().getStringProperty("myprop", "NOT FOUND").get();

assertThat(myProp, equalTo("myprop_value_default"));

Archaius can load property appropriate to an environment, consider that there is a "sample-perf.properties" with the same configuration over-ridden for perf environment:


myprop=myprop_value_perf

Now Archaius can be instructed to load the configuration in a cascaded way by adding the following in sample.properties file:
myprop=myprop_value_default

@next=sample-${@environment}.properties

And the test would look like this:

ConfigurationManager.getDeploymentContext().setDeploymentEnvironment("perf");
ConfigurationManager
.loadCascadedPropertiesFromResources("sample");

String myProp = DynamicPropertyFactory.getInstance().getStringProperty("myprop", "NOT FOUND").get();

assertThat(myProp, equalTo("myprop_value_perf"));

Spring Property basics


Spring property basics are very well explained at the Spring Framework reference site here. In short, if there is a property file "sample.properties", it can be loaded up and referenced the following way:

@Configuration
@PropertySource("classpath:/sample.properties")
public class AppConfig {
@Autowired
Environment env;

@Bean
public TestBean testBean() {
TestBean testBean = new TestBean();
testBean.setName(env.getProperty("myprop"));
return testBean;
}


}

Or even simpler, they can be de-referenced with placeholders this way:
@Configuration
@PropertySource("classpath:/sample.properties")
public class AppConfig {
@Value("${myprop}")
private String myProp;

@Bean
public TestBean testBean() {
TestBean testBean = new TestBean();
testBean.setName(myProp));
return testBean;
}

@Bean
public static PropertySourcesPlaceholderConfigurer propertySourcesPlaceholderConfigurer() {
return new PropertySourcesPlaceholderConfigurer();
}

}


Making Archaius properties visible to Spring


So now the question is how to get the Archaius properties visible in Spring, the approach I have taken is a little quick and dirty one but can be cleaned up to suite your needs. My approach is to define a Spring PropertySource which internally delegates to Archaius:

import com.netflix.config.ConfigurationManager;
import com.netflix.config.DynamicPropertyFactory;
import org.slf4j.Logger;
import org.slf4j.LoggerFactory;
import org.springframework.core.env.PropertySource;

import java.io.IOException;

public class SpringArchaiusPropertySource extends PropertySource<Void> {


private static final Logger LOGGER = LoggerFactory.getLogger(SpringArchaiusPropertySource.class);


public SpringArchaiusPropertySource(String name) {
super(name);
try {
ConfigurationManager
.loadCascadedPropertiesFromResources(name);
} catch (IOException e) {
LOGGER.warn(
"Cannot find the properties specified : {}", name);
}

}

@Override
public Object getProperty(String name) {
return DynamicPropertyFactory.getInstance().getStringProperty(name, null).get();
}
}

The tricky part is registering this new PropertySource with Spring, this can be done using an ApplicationContextInitializer which is triggered before the application context is initialized:

import com.netflix.config.ConfigurationBasedDeploymentContext;
import org.springframework.context.ApplicationContextInitializer;
import org.springframework.context.ConfigurableApplicationContext;
import org.springframework.util.StringUtils;

public class SpringProfileSettingApplicationContextInitializer
implements ApplicationContextInitializer<ConfigurableApplicationContext> {

@Override
public void initialize(ConfigurableApplicationContext ctx) {
ctx.getEnvironment()
.getPropertySources()
.addFirst(new SpringArchaiusPropertySource("samples"));
}
}

And finally registering this new ApplicationContextInitializer with Spring is described here

This is essentially it, now the Netflix Archaius properties should work in a Spring application.

Using rx-java Observable in a Spring MVC flow

$
0
0
Spring MVC has supported asynchronous request processing flow for sometime now and this support internally utilizes the Servlet 3 async support of containers like Tomcat/Jetty.

Spring Web Async support

Consider a service call that takes a little while to process, simulated with a delay:

public CompletableFuture<Message> getAMessageFuture() {
return CompletableFuture.supplyAsync(() -> {
logger.info("Start: Executing slow task in Service 1");
Util.delay(1000);
logger.info("End: Executing slow task in Service 1");
return new Message("data 1");
}, futureExecutor);
}

If I were to call this service in a user request flow, the traditional blocking controller flow would look like this:

@RequestMapping("/getAMessageFutureBlocking")
public Message getAMessageFutureBlocking() throws Exception {
return service1.getAMessageFuture().get();
}

A better approach is to use the Spring Asynchronous support to return the result back to the user when available from the CompletableFuture, this way not holding up the containers thread:

@RequestMapping("/getAMessageFutureAsync")
public DeferredResult<Message> getAMessageFutureAsync() {
DeferredResult<Message> deffered = new DeferredResult<>(90000);
CompletableFuture<Message> f = this.service1.getAMessageFuture();
f.whenComplete((res, ex) -> {
if (ex != null) {
deffered.setErrorResult(ex);
} else {
deffered.setResult(res);
}
});
return deffered;
}

Using Observable in a Async Flow


Now to the topic of this article, I have been using Rx-java's excellent Observable type as my service return types lately and wanted to ensure that the web layer also remains asynchronous in processing the Observable type returned from a service call.

Consider the service that was described above now modified to return an Observable:

public Observable<Message> getAMessageObs() {
return Observable.<Message>create(s -> {
logger.info("Start: Executing slow task in Service 1");
Util.delay(1000);
s.onNext(new Message("data 1"));
logger.info("End: Executing slow task in Service 1");
s.onCompleted();
}).subscribeOn(Schedulers.from(customObservableExecutor));
}

I can nullify all the benefits of returning an Observable by ending up with a blocking call at the web layer, a naive call will be the following:

@RequestMapping("/getAMessageObsBlocking")
public Message getAMessageObsBlocking() {
return service1.getAMessageObs().toBlocking().first();
}

To make this flow async through the web layer, a better way to handle this call is the following, essentially by transforming Observable to Spring's DeferredResult type:

@RequestMapping("/getAMessageObsAsync")
public DeferredResult<Message> getAMessageAsync() {
Observable<Message> o = this.service1.getAMessageObs();
DeferredResult<Message> deffered = new DeferredResult<>(90000);
o.subscribe(m -> deffered.setResult(m), e -> deffered.setErrorResult(e));
return deffered;
}

This would ensure that the thread handling the user flow would return as soon as the service call is complete and the user response will be processed reactively once the observable starts emitting values.


If you are interested in exploring this further, here is a github repo with working samples: https://github.com/bijukunjummen/spring-web-observable.

References:

Spring's reference guide on async flows in the web tier: http://docs.spring.io/spring/docs/current/spring-framework-reference/html/mvc.html#mvc-ann-async

More details on Spring DeferredResult by the inimitable Tomasz Nurkiewicz at the NoBlogDefFound blog - http://www.nurkiewicz.com/2013/03/deferredresult-asynchronous-processing.html

Hot and cold rx-java Observable

$
0
0
My own understanding of Hot and Cold Observable is quite shaky, but here is what I have understood till now!

Cold Observable

Consider an API which returns an rx-java Observable:

import obs.Util;
import org.slf4j.Logger;
import org.slf4j.LoggerFactory;
import rx.Observable;
import rx.schedulers.Schedulers;

public class Service1 {
private static final Logger logger = LoggerFactory.getLogger(Service1.class);
public Observable<String> operation() {
return Observable.<String>create(s -> {
logger.info("Start: Executing slow task in Service 1");
Util.delay(1000);
s.onNext("data 1");
logger.info("End: Executing slow task in Service 1");
s.onCompleted();
}).subscribeOn(Schedulers.computation());
}
}

Now, the first thing to note is that the typical Observable does not do anything until it is subscribed to:

So essentially if I were to do this:

Observable<String> op1 = service1.operation();

Nothing would be printed or returned, unless there is a subscription on the Observable this way:

Observable<String> op1 = service1.operation();

CountDownLatch latch = new CountDownLatch(1);

op1.subscribe(s -> logger.info("From Subscriber 1: {}", s),
e -> logger.error(e.getMessage(), e),
() -> latch.countDown());

latch.await();

So now, what happens if there are multiple subscriptions on this Observable:

Observable<String> op1 = service1.operation();

CountDownLatch latch = new CountDownLatch(3);

op1.subscribe(s -> logger.info("From Subscriber 1: {}", s),
e -> logger.error(e.getMessage(), e),
() -> latch.countDown());

op1.subscribe(s -> logger.info("From Subscriber 2: {}", s),
e -> logger.error(e.getMessage(), e),
() -> latch.countDown());

op1.subscribe(s -> logger.info("From Subscriber 3: {}", s),
e -> logger.error(e.getMessage(), e),
() -> latch.countDown());

latch.await();

With a cold observable the code would get called once more and the items emitted again, I get this on my machine:

06:04:07.206 [RxComputationThreadPool-2] INFO  o.b.Service1 - Start: Executing slow task in Service 1
06:04:07.208 [RxComputationThreadPool-3] INFO o.b.Service1 - Start: Executing slow task in Service 1
06:04:08.211 [RxComputationThreadPool-2] INFO o.b.BasicObservablesTest - From Subscriber 2: data 1
06:04:08.211 [RxComputationThreadPool-1] INFO o.b.BasicObservablesTest - From Subscriber 1: data 1
06:04:08.211 [RxComputationThreadPool-3] INFO o.b.BasicObservablesTest - From Subscriber 3: data 1
06:04:08.213 [RxComputationThreadPool-2] INFO o.b.Service1 - End: Executing slow task in Service 1
06:04:08.214 [RxComputationThreadPool-1] INFO o.b.Service1 - End: Executing slow task in Service 1
06:04:08.214 [RxComputationThreadPool-3] INFO o.b.Service1 - End: Executing slow task in Service 1

Hot Observable - using ConnectableObservable


Hot Observable on the other hand does not really need a subscription to start emitting items. A way to implement a Hot Observable is using a ConnectableObservable, which is a Observable which does not emit items until its connect method is called, however once it starts emitting items, any subscriber to it gets items only from the point of subscription. So again revisiting the previous example, but with a ConnectableObservable instead:

Observable<String> op1 = service1.operation();

ConnectableObservable<String> connectableObservable = op1.publish();

CountDownLatch latch = new CountDownLatch(3);

connectableObservable.subscribe(s -> logger.info("From Subscriber 1: {}", s),
e -> logger.error(e.getMessage(), e),
() -> latch.countDown());

connectableObservable.subscribe(s -> logger.info("From Subscriber 2: {}", s),
e -> logger.error(e.getMessage(), e),
() -> latch.countDown());

connectableObservable.subscribe(s -> logger.info("From Subscriber 3: {}", s),
e -> logger.error(e.getMessage(), e),
() -> latch.countDown());

connectableObservable.connect();

latch.await();

and the following gets printed:
06:07:23.852 [RxComputationThreadPool-3] INFO  o.b.Service1 - Start: Executing slow task in Service 1
06:07:24.860 [RxComputationThreadPool-3] INFO o.b.ConnectableObservablesTest - From Subscriber 1: data 1
06:07:24.862 [RxComputationThreadPool-3] INFO o.b.ConnectableObservablesTest - From Subscriber 2: data 1
06:07:24.862 [RxComputationThreadPool-3] INFO o.b.ConnectableObservablesTest - From Subscriber 3: data 1
06:07:24.862 [RxComputationThreadPool-3] INFO o.b.Service1 - End: Executing slow task in Service 1

Hot Observable - using Subject

Another way to convert a cold Observable to a hot one is to use a Subject. Subjects behave both as an Observable and an Observer, there are different types of Subjects available with different behavior. Here I am using a Subject called a PublishSubject which has a Pub/Sub behavior - the items get emitted to all the subscribers listening on it. So with a PublishSubject introduced the code looks like this:

Observable<String> op1 = service1.operation();

PublishSubject<String> publishSubject = PublishSubject.create();

op1.subscribe(publishSubject);

CountDownLatch latch = new CountDownLatch(3);

publishSubject.subscribe(s -> logger.info("From Subscriber 1: {}", s),
e -> logger.error(e.getMessage(), e),
() -> latch.countDown());

publishSubject.subscribe(s -> logger.info("From Subscriber 2: {}", s),
e -> logger.error(e.getMessage(), e),
() -> latch.countDown());

publishSubject.subscribe(s -> logger.info("From Subscriber 3: {}", s),
e -> logger.error(e.getMessage(), e),
() -> latch.countDown());


latch.await();

See how the PublishSubject is introduced as a subscriber to the Observable and the other subscribers subscribe to the PublishSubject instead. The output will be similar to the one from ConnectableObservable.

This is essentially it, the extent of my understanding of Hot Observable. So to conclude, the difference between a Cold and a Hot Observable is about when the subscribers get the emitted items and when the items are emitted - with a Cold Observable they are emitted when they are subscribed to and typically get all the emitted items, with a Hot Observable the items are emitted without a Subscriber and subscribers get items emitted after the point of subscription typically.


Reference

1. http://www.introtorx.com/content/v1.0.10621.0/14_HotAndColdObservables.html
2. Excellent javadoc on rx-java - http://reactivex.io/RxJava/javadoc/index.html
Viewing all 250 articles
Browse latest View live